Video: how to install
See in 1 minute how to install Haaify Talks from the Blip Store: find the extension, choose the plan and the chatbot, create the company workspace and sign in.
Demo video
Watch the step-by-step Haaify Talks video
▶ Watch the videoIntroduction
Haaify Talks is an extension created by Haaify, a Blip partner, so that people in your company can talk in channels and direct messages and follow Blip Desk customer service without switching tools.
It is a good fit for companies with human service teams, supervisors who need to see the queue in real time, and teams that currently talk through personal messaging apps with no organized history.
Every new company gets a 10-day free trial with all features. Haaify Talks is available in Portuguese, Spanish and English.
Features
Main features:
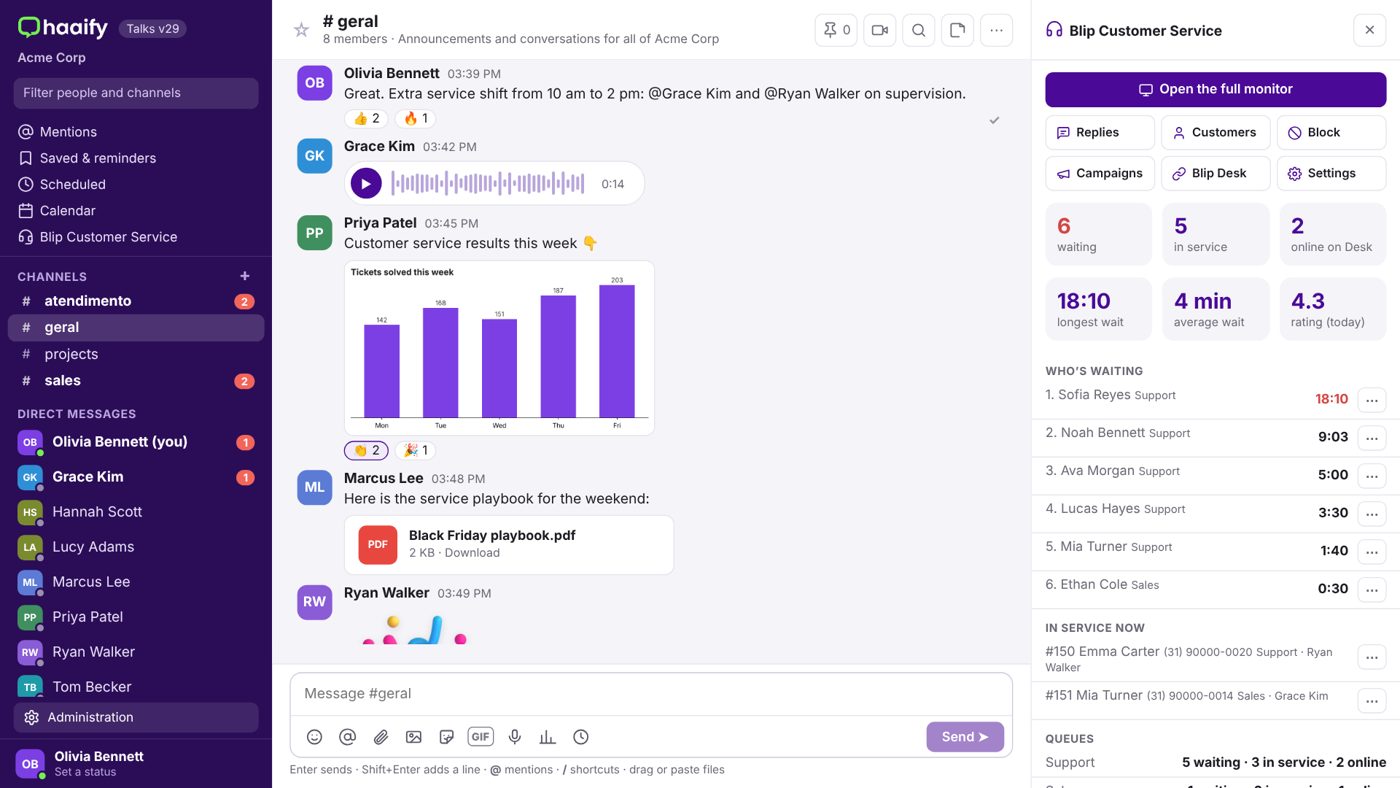
- Team chat: channels by team or project, direct messages, mentions, reactions, threaded replies and history search.
- Files and media: photos, voice messages and files up to 25 MB; stickers, GIFs and icons.
- Calendar: Google, Outlook or a calendar link, with meeting reminders. A Microsoft account is only used to connect the Outlook calendar (it is not a sign-in method).
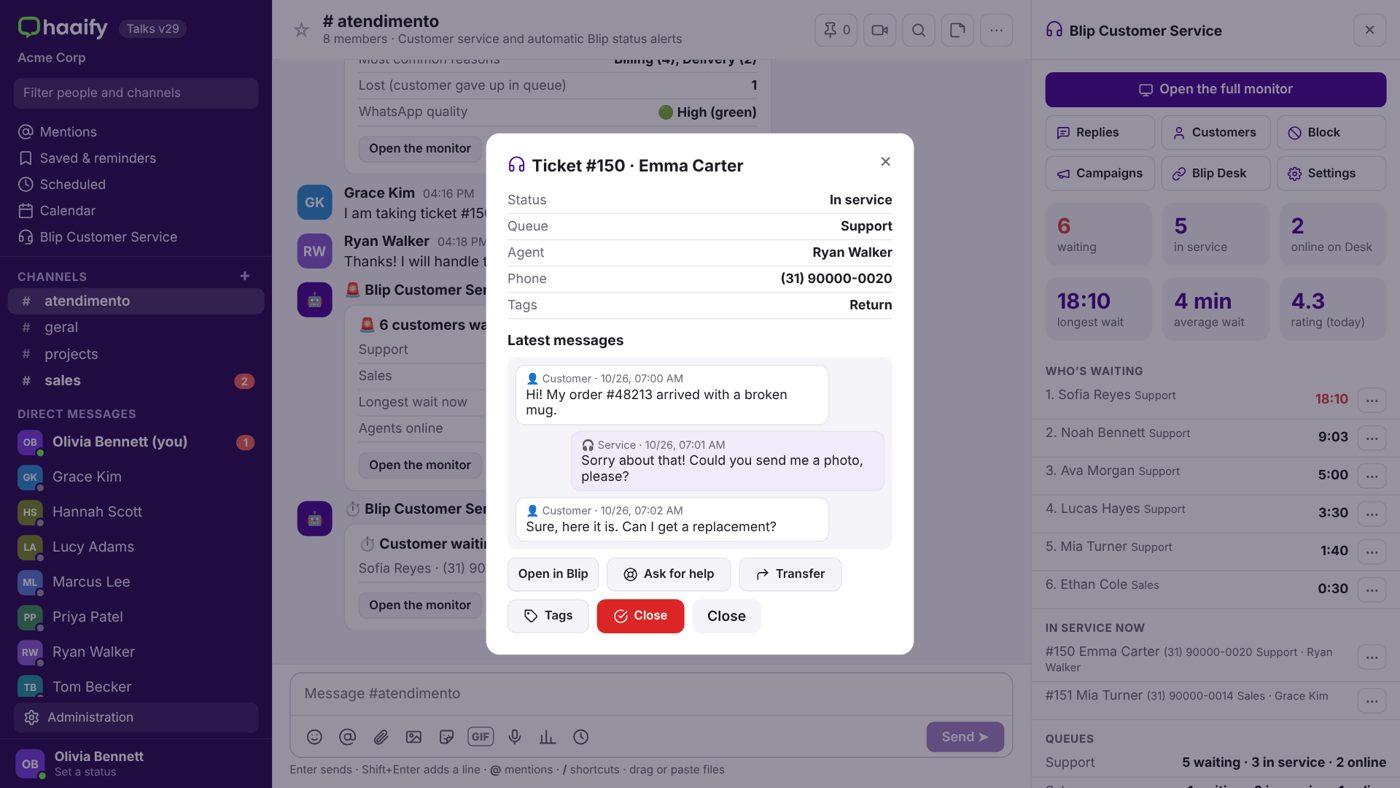
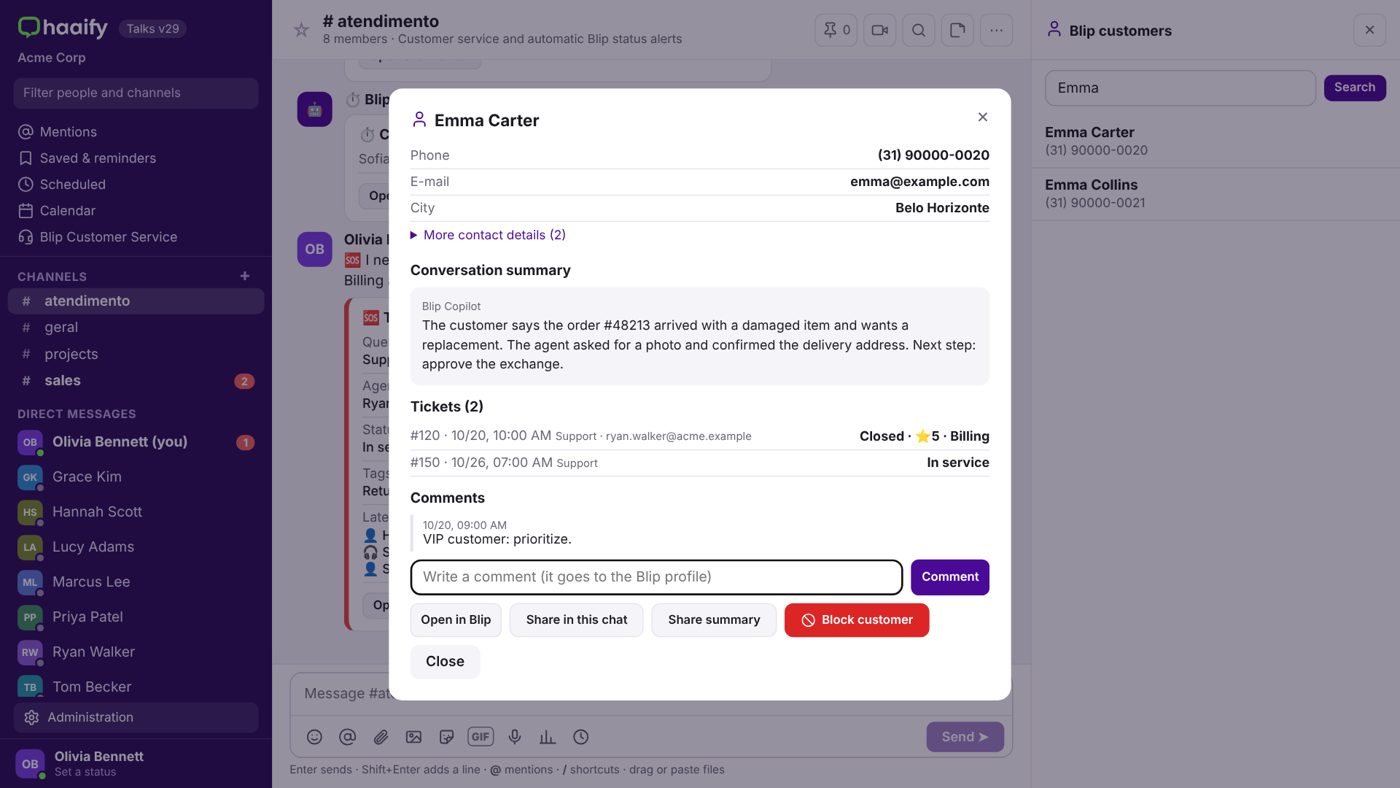
- Service+: in the Blip Customer Service panel: live Blip Desk queue and tickets (Transfer, Change tags and Close), Ask for help from a teammate, Quick replies, customer profile with conversation summary, and Campaigns.
- Customer blocking: block abusive customers by name, phone number or from the ticket, even numbers that have not talked to the bot yet.
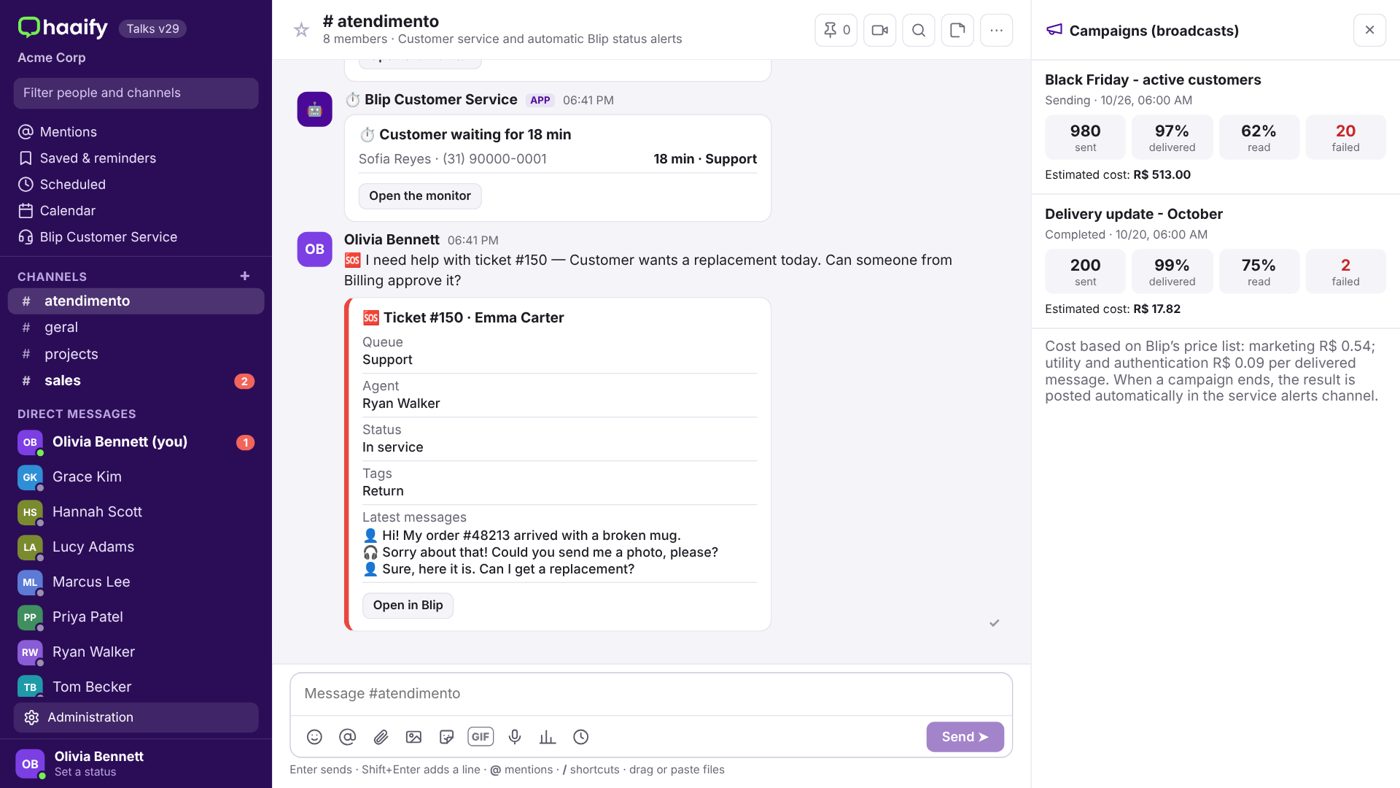
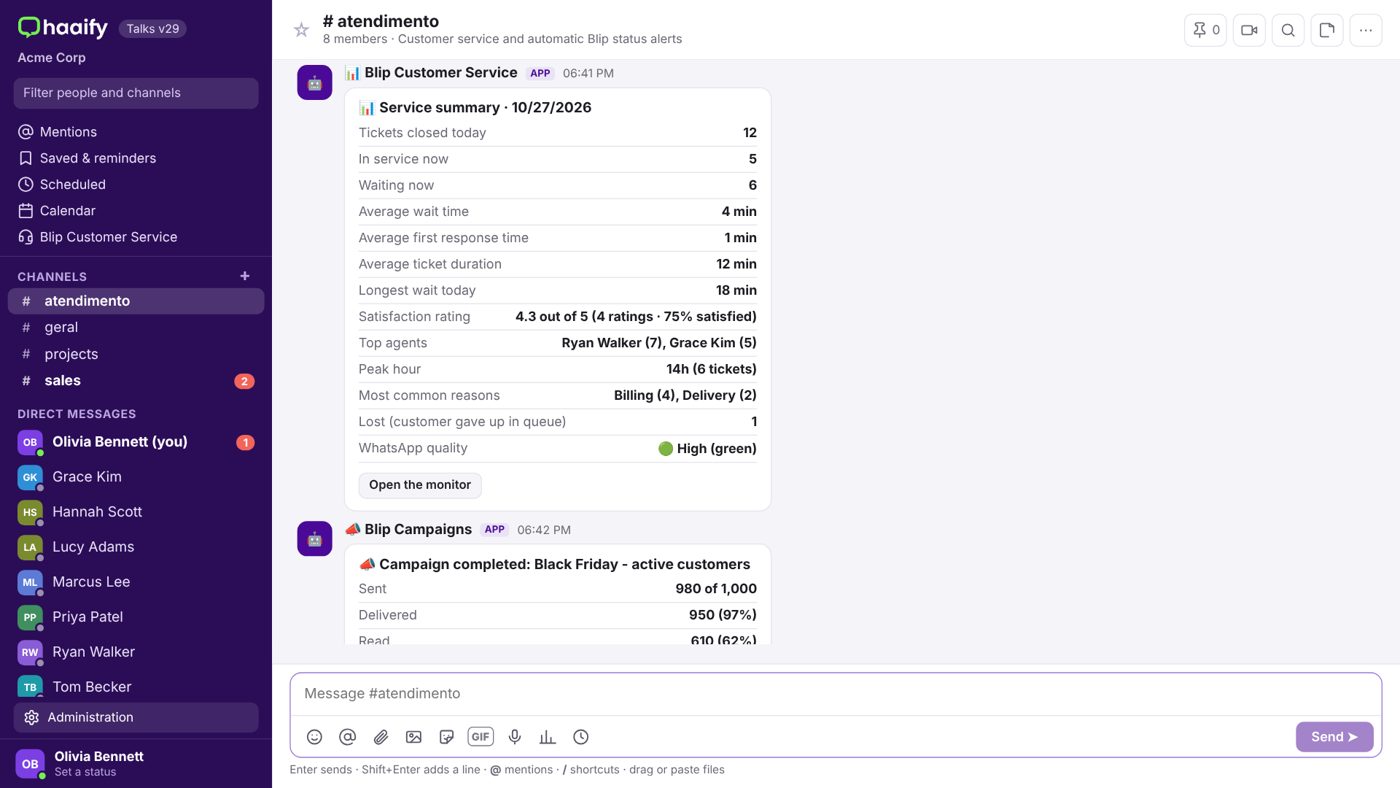
- Alerts and campaigns: queue alerts, customers without an agent reply, WhatsApp 24-hour window about to close, daily summary per agent, automatic notice when Blip is unstable and campaign results with estimated cost.
- Administration: Usage reports, People in the plan and Export conversations (Master user only).
- Desktop and mobile: works in the desktop browser and on mobile, with notifications that do not repeat.
Supported channels
Haaify Talks works with any Blip bot and any channel served by Blip Desk (for example, WhatsApp, Instagram, Messenger and Blip Chat), because it uses Blip Desk information and your bot’s Keys.
Installation and Setup
Before you start, have at hand:
- Administrator access to your company’s contract on Blip.
- The Key of the router bot (or main bot) and, if Blip Desk runs on a different bot, that bot’s Key.
- The e-mail addresses of the people who will use Haaify Talks.
Install it from the Blip Store
In Blip, open the Blip Store, search for “Haaify Talks” and click Install extension. Choose the plan, confirm the subscription and choose the chatbot where the extension will live. Then click Set up the extension now. The 10-day free trial starts at installation and billing only starts after it.
Set up your company workspace
The extension page opens inside the Blip portal. Name your company workspace; the Master admin name and e-mail are pre-filled from Blip. For security, the Master must be the person who subscribed to Haaify Talks in the Blip Store or someone with an e-mail from the same company domain. Click Create the company workspace.
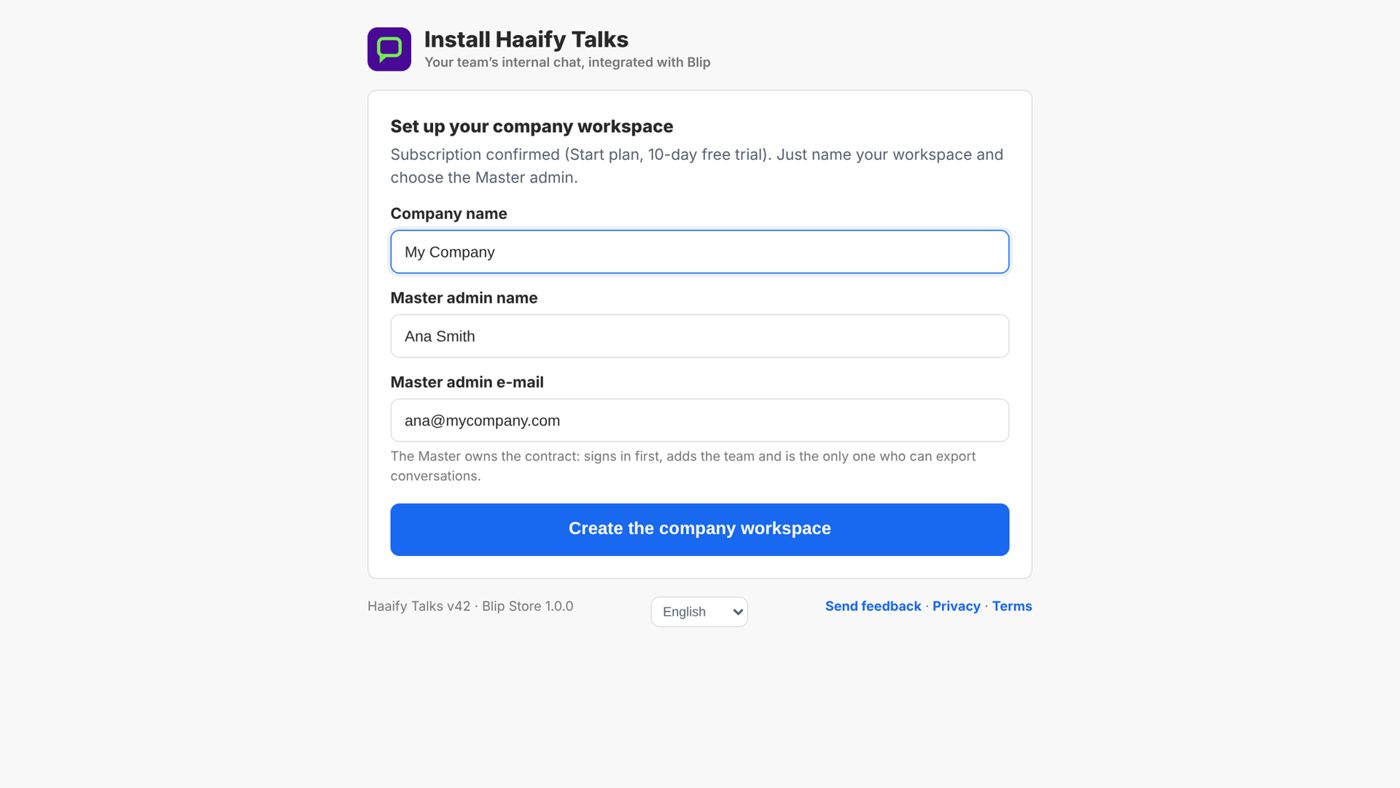
Click “Open Haaify Talks”
The page shows Haaify Talks installed, the plan, the subscription status (for example, Free trial · 10 days left) and the Master admin. The Open Haaify Talks button opens the app in a new tab at talks.haaify.com. Bookmark this address or install the app on your phone.
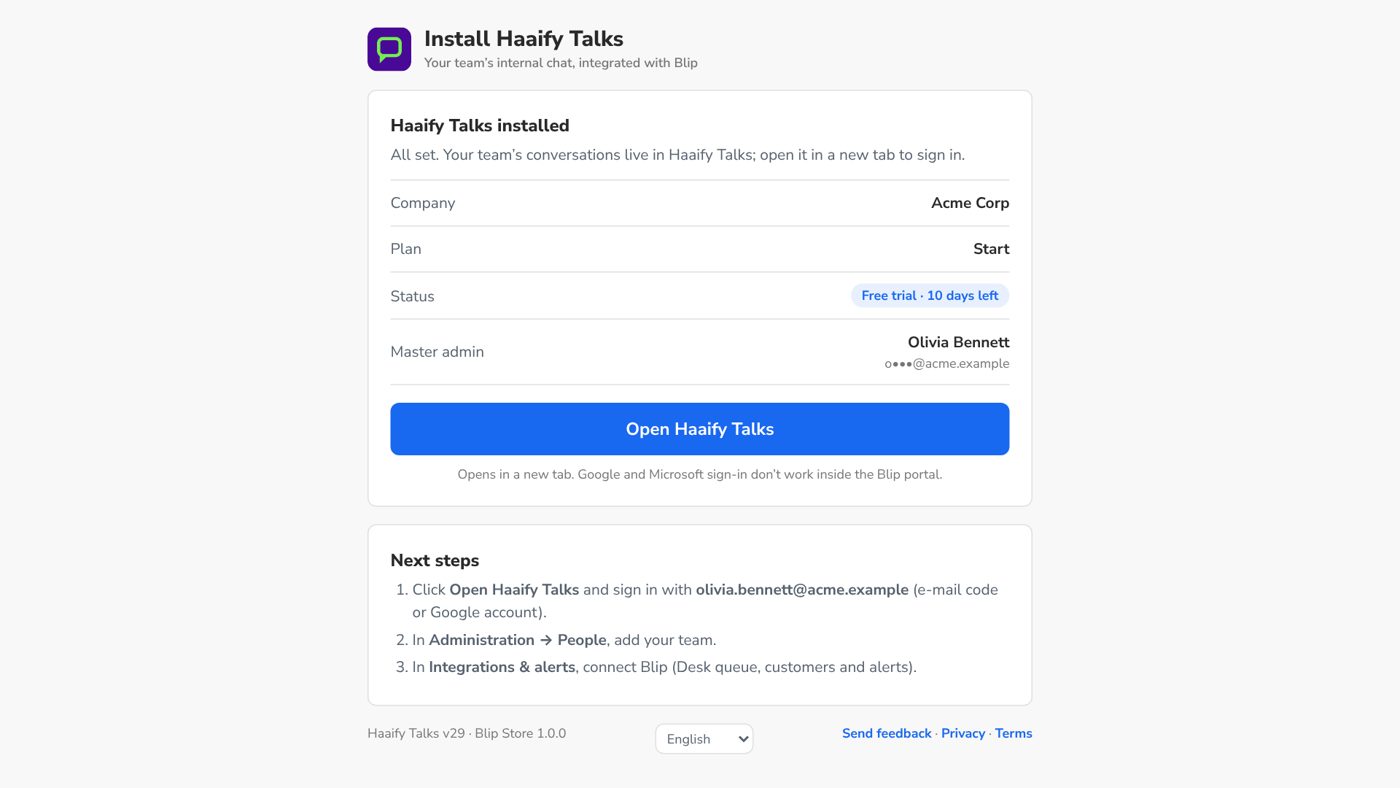
Sign in as the Master user
Sign in with the company’s Google account, or click Get a code by e-mail and type the 6-digit code you receive. There is no Microsoft sign-in: a Microsoft account is only used to connect the Outlook calendar.
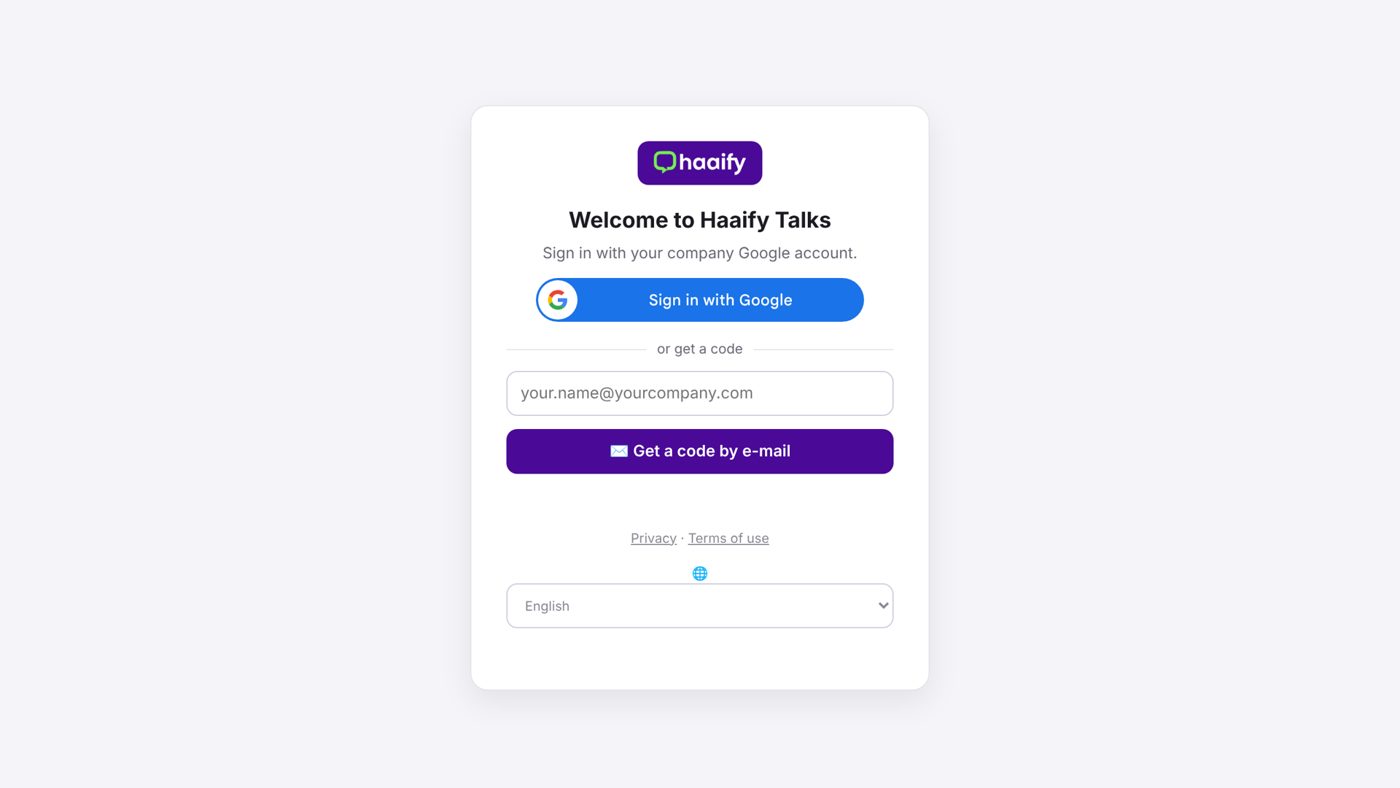
Connect your Blip
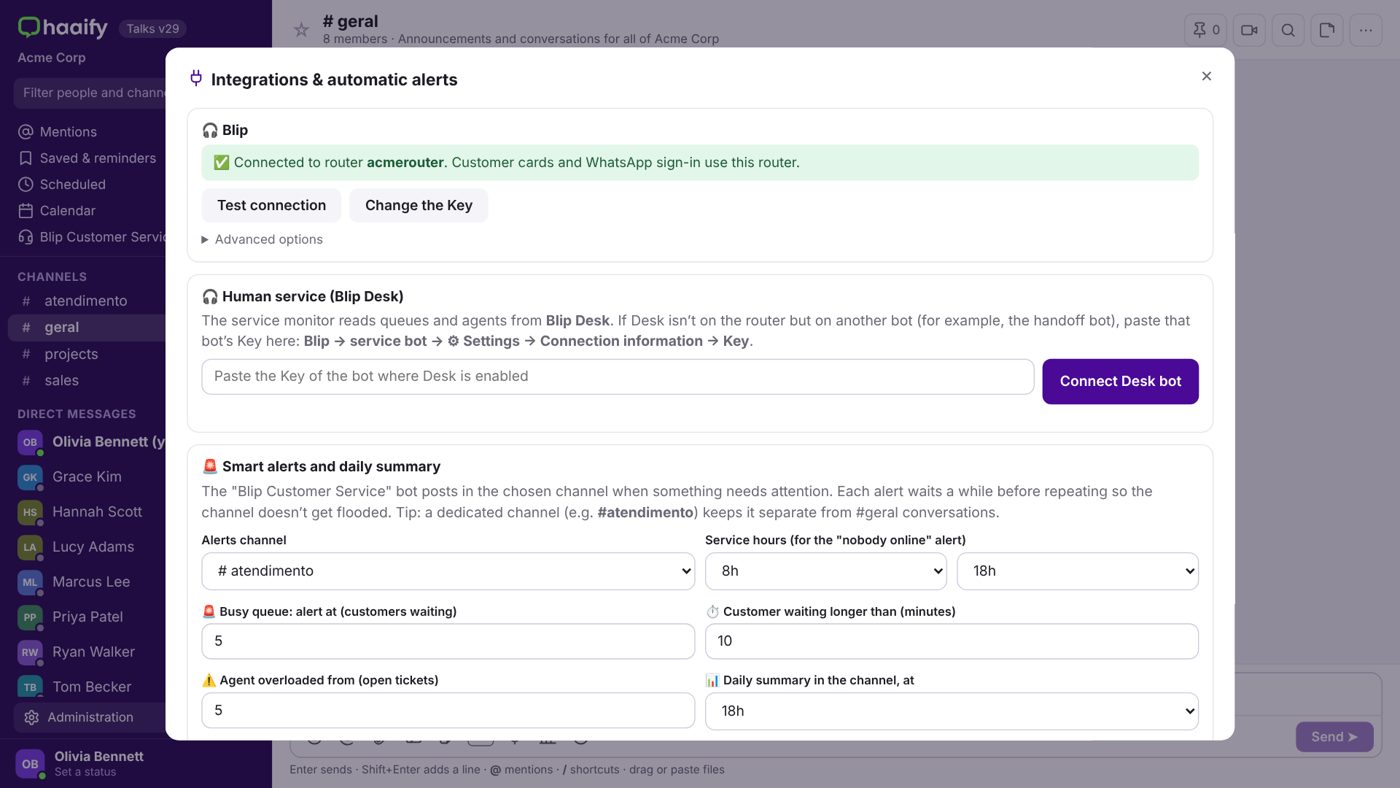
Open Administration → Integrations & alerts. In the Blip portal, open the router bot, click the gear (Settings) → Connection information → HTTP and copy the Key. Paste it in Haaify Talks and click Connect. If Blip Desk runs on a different bot, paste that bot’s Key in the Human service (Blip Desk) section.
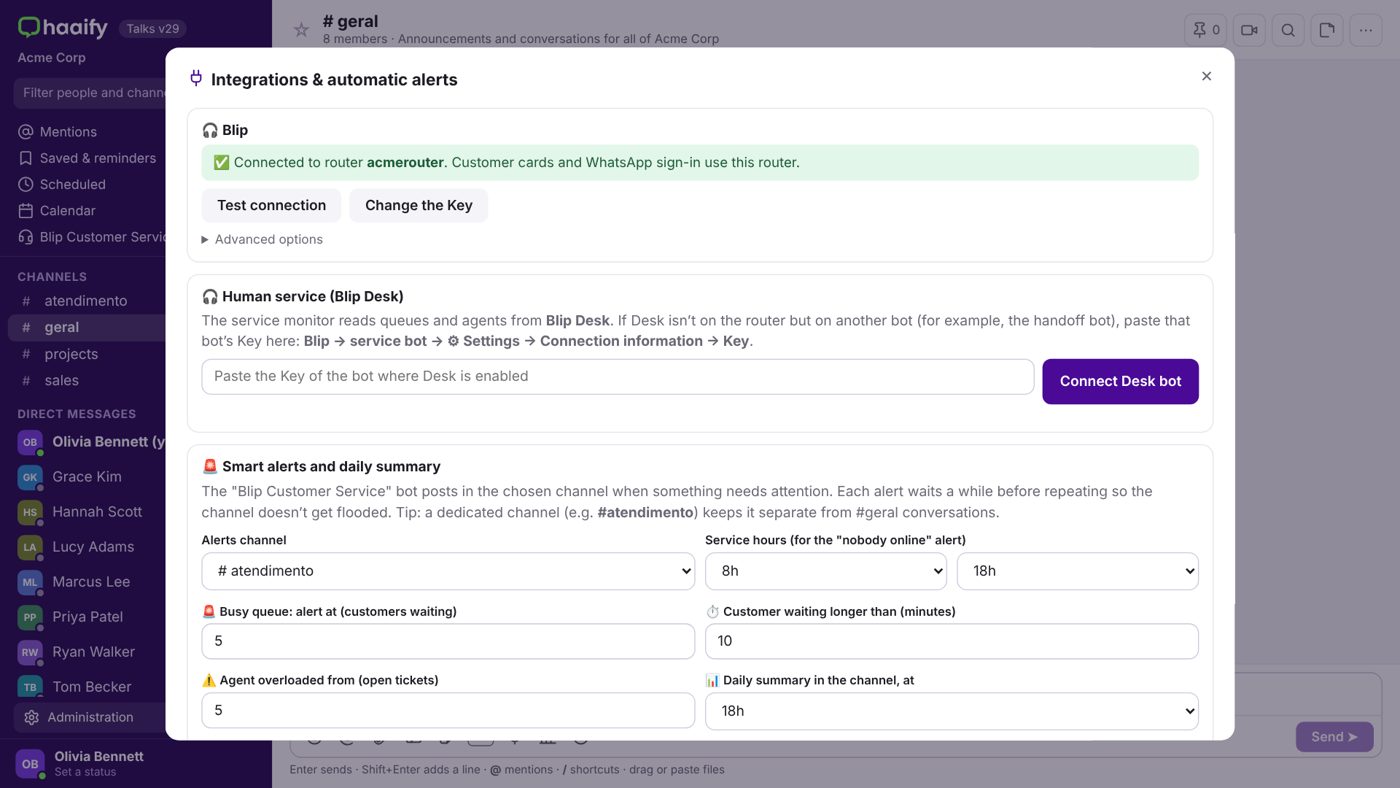
Choose your alerts
Still in Integrations & alerts, in Smart alerts and daily summary, choose the channel that will receive service alerts (by default, #atendimento), the queue limits and the time of the daily summary. Campaign results and Blip instability notices arrive in the same channel.
Invite people
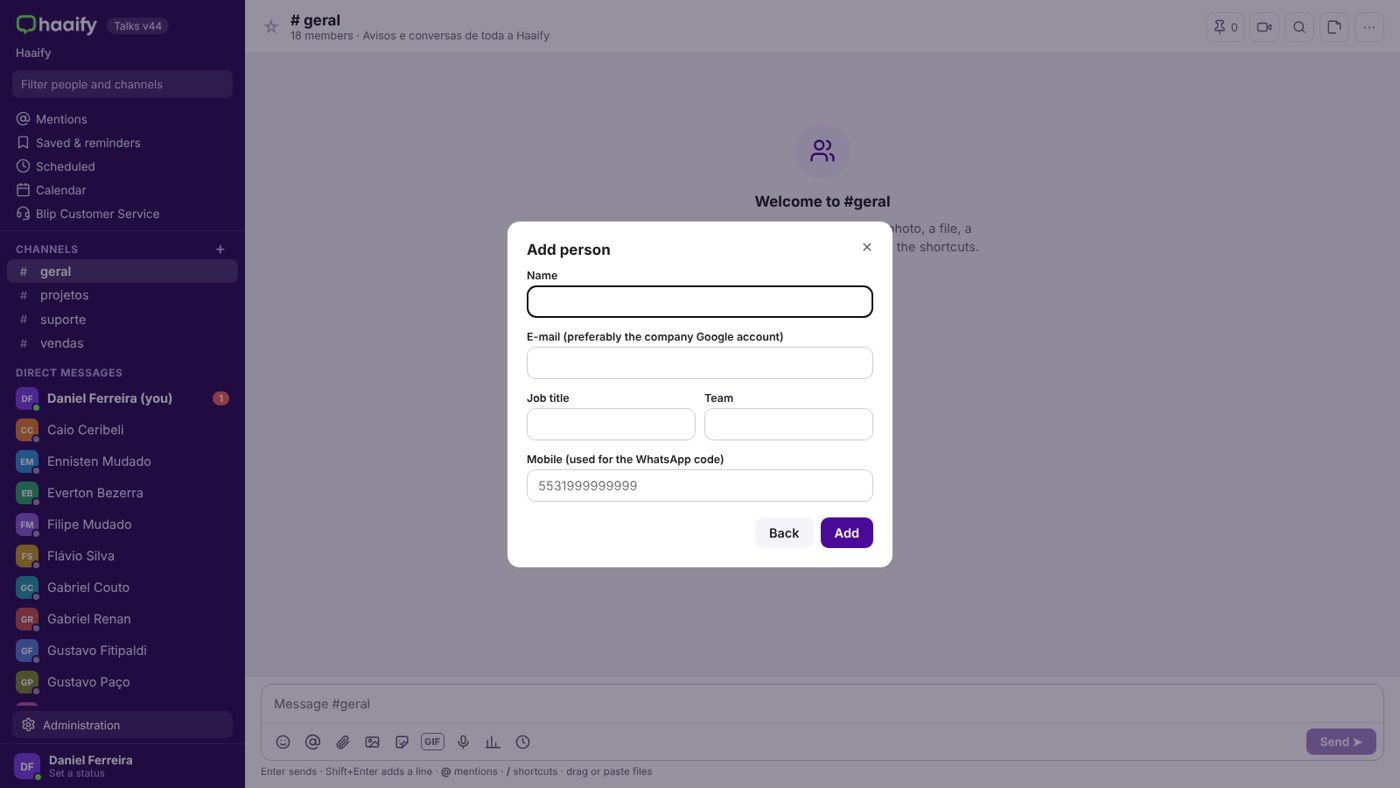
Open Administration → People → + Add person and enter each person’s name and e-mail. They sign in with Google or an e-mail code. The number of people follows the plan limit.
To use customer blocking
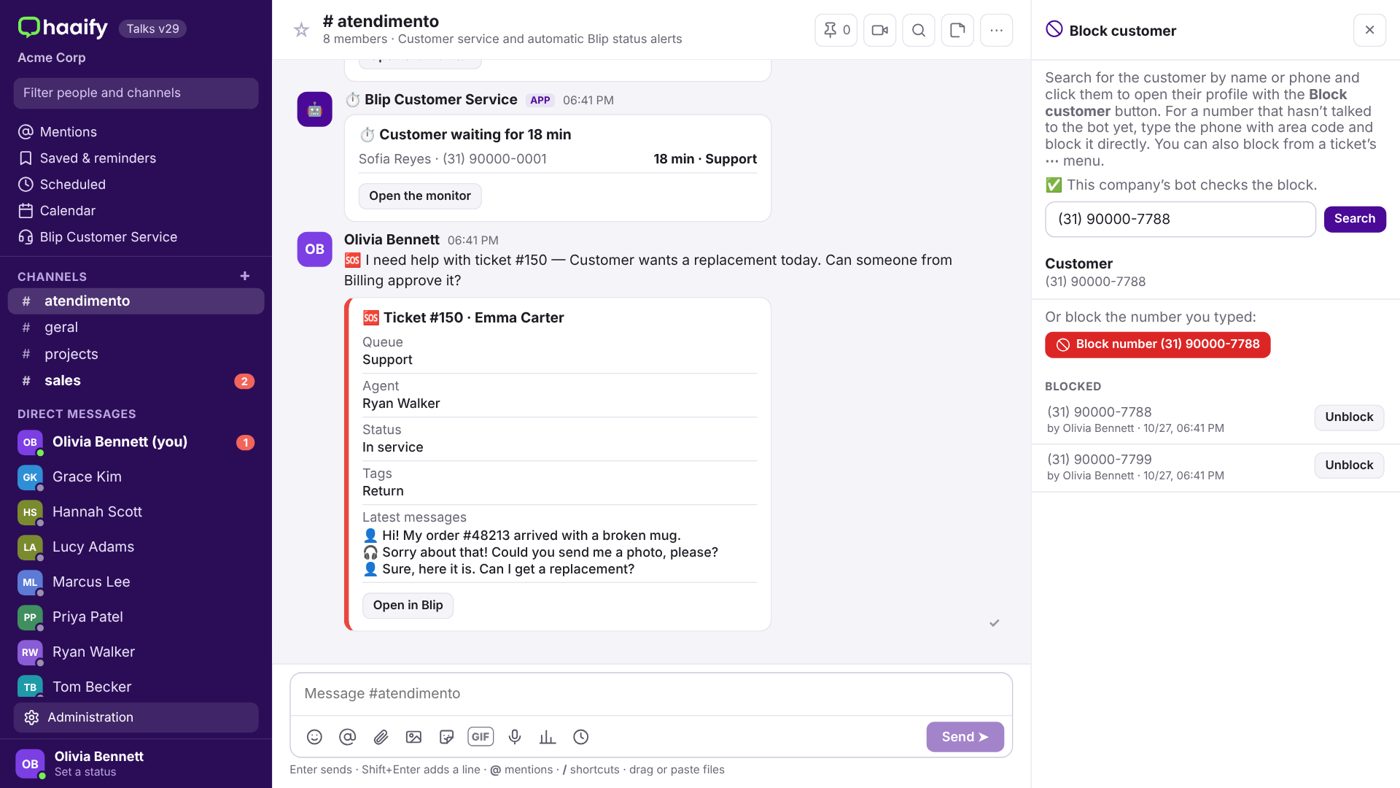
Blocking saves the contact.extras.blocklistStatus field on the contact (value userBlocked or userUnblocked). For blocking to work, your entry bot flow must check this field at the start of the conversation and end the conversation when the value is userBlocked. After adjusting the flow, mark in the Block customer panel that the flow already checks blocking. Haaify can help you with this adjustment.
Use cases
- Asking for help during a conversation: An agent gets a question they cannot answer. On the ticket, they click Ask for help; the request appears in the #atendimento channel with the customer’s latest messages and the supervisor answers right there, so the customer does not wait.
- Growing queue: Haaify Talks posts an alert in the #atendimento channel when many customers are waiting. The supervisor transfers tickets between queues from the panel and calls more people through the same chat.
- Abusive customer: A customer sends repeated offensive messages. In the Blip Customer Service panel, the supervisor opens Block customer, searches by phone number and blocks them. The bot then ends the next messages from that contact.
- Campaign results: When a message campaign finishes, the results and estimated cost appear automatically in the alerts channel, and the sales team discusses them right there.
- Blip instability: If Blip becomes unstable, everyone gets an automatic notice with the status link, avoiding duplicate support requests.
How to cancel the subscription
- In Blip, open Blip Store → My subscriptions, choose Haaify Talks and click Cancel extension.
- Uninstalling the extension from a chatbot does not cancel the subscription: billing only stops when the subscription is cancelled. When you cancel, Blip uninstalls the extension from every chatbot automatically.
- After cancellation, only the Master admin can still sign in to Haaify Talks, for 30 days, to download the conversations in Administration → Export conversations.
Need more help?
Haaify Talks support is provided by the Haaify team.
- E-mail: suporte@haaify.com
- Phone: +1 (781) 527-9776
- Support page: https://talks.haaify.com/en/support
- Hours: business days, 8 am to 6 pm (Brasília time, UTC−3), for regular requests.
- 24/7 on-call for critical incidents (Haaify Talks down for the whole company), including weekends and holidays: write CRITICAL in the e-mail subject.
- Availability target: 99.5% per month.
When you open a request, include your company name, what happened and, if possible, a screenshot.
Contact supportImages in English, following the Blip Help standard.